
Introduction
Craving a delicious, chewy bagel but need to keep it gluten-free? You’re not alone! Whether you’re avoiding gluten due to celiac disease, gluten sensitivity, or just looking for a healthier alternative, gluten free bagels can be just as satisfying as traditional ones—when made right. But let’s be honest: store-bought options can be hit or miss. Some are too dense, others fall apart, and finding one with that perfect chew is like searching for a needle in a haystack.
The good news? You can make soft, chewy, and flavorful gluten free bagels right at home—and it’s easier than you think! With the right blend of flours, a few simple techniques, and some pro tips, you’ll be biting into a freshly baked bagel that rivals any bakery version.
In this guide, we’ll walk you through step-by-step instructions to make the best gluten free bagels, from selecting the perfect ingredients to achieving that golden, crisp crust. Plus, we’ll share tips on how to customize your bagels with toppings, flavor variations, and even dairy-free or vegan alternatives.
Let’s get baking! 🍩✨
What Makes a Great Gluten Free Bagel?
Creating gluten free bagels that taste just as good—if not better—than traditional wheat-based bagels comes down to three key factors: achieving the right texture, using the right ingredients, and following essential techniques like boiling before baking.
1. The Secret to a Soft, Chewy Texture
One of the biggest challenges with gluten free baking is texture. Traditional bagels get their signature chewiness from gluten, a protein that provides elasticity and structure. Without gluten, bagels can become dry, crumbly, or too dense if not prepared correctly.
To mimic that chewy, doughy texture, you need:
✅ A well-balanced gluten free flour blend (a mix of starches and whole grain flours)
✅ Binding agents like xanthan gum or psyllium husk to add elasticity
✅ Proper hydration (gluten free flours absorb more moisture than wheat flour)
✅ A good proofing process to help the dough rise and develop air pockets
2. Key Differences Between Gluten Free and Traditional Bagels
Gluten free bagels require a different approach than wheat-based bagels. Here’s how they compare:
| Feature | Traditional Bagels | Gluten Free Bagels |
|---|---|---|
| Texture | Naturally chewy from gluten | Requires binders for elasticity |
| Flour Type | Wheat flour | Rice, oat, almond, or tapioca blends |
| Proofing Time | 1–2 hours | Can take longer for better rise |
| Moisture Level | Less hydration needed | More hydration for soft texture |
| Boiling Step | Essential for crust | Still needed for best results |
Understanding these differences is crucial when making gluten free bagels, as you’ll need to adjust hydration, mixing, and proofing techniques accordingly.
3. Why Boiling is Crucial for Gluten Free Bagels
Boiling might seem like an optional step, but it’s actually one of the most important techniques for achieving a classic bagel texture. Here’s why:
✔ Creates a crisp, golden crust – Boiling gelatinizes the outer layer, leading to that signature bagel exterior.
✔ Helps bagels keep their shape – The quick hot water bath prevents them from spreading out too much during baking.
✔ Improves chewiness – The combination of boiling and baking locks in moisture while enhancing the dense, satisfying bite.
💡 Pro Tip: Add honey or baking soda to the boiling water! This enhances browning and gives bagels a subtle sweetness, similar to classic New York-style bagels.
By mastering these key elements, you’ll be well on your way to making homemade gluten free bagels that taste just as good as (or even better than) store-bought versions. Now, let’s dive into the essential ingredients you’ll need!
Essential Ingredients for Gluten Free Bagels

Making gluten free bagels requires a careful selection of ingredients that replicate the texture, structure, and flavor of traditional wheat-based bagels. Since gluten plays a key role in elasticity and chewiness, we need to combine the right gluten free flours, binders, and leavening agents to achieve a similar effect. Below, we’ll break down the most important ingredients and how they contribute to the perfect bagel.
1. Gluten Free Flour Blend: Choosing the Best Base
Unlike all-purpose wheat flour, which contains gluten for structure and elasticity, gluten free baking requires a blend of different flours and starches to achieve a balanced texture.
The best gluten free flour blend for bagels typically includes:
✔ Rice Flour (White or Brown) – Provides a neutral base and mild flavor.
✔ Tapioca Starch or Arrowroot Flour – Adds lightness and helps mimic the chewiness of gluten.
✔ Oat Flour – Enhances texture and gives a slightly nutty flavor.
✔ Almond Flour (Optional) – Adds moisture and a slightly denser texture for a heartier bagel.
✔ Sorghum or Millet Flour (Optional) – Contributes to a more complex, wheaty-like taste.
💡 Pro Tip: If you prefer convenience, use a store-bought gluten free flour blend labeled as “1:1 gluten free baking flour.” Look for one that contains xanthan gum or guar gum to help with elasticity.
2. Binding Agents: The Key to a Chewy Texture
Since gluten acts as a natural binder in traditional bagels, we need alternative binding agents to prevent the dough from becoming crumbly or dry.
The best options include:
✅ Xanthan Gum – The most commonly used binder that improves elasticity and prevents crumbling.
✅ Psyllium Husk Powder – Absorbs moisture and creates a more dough-like consistency, ideal for gluten free bagels.
✅ Ground Flaxseed or Chia Seeds (Optional) – Mixed with water, these form a gel that can help bind the dough while adding extra fiber.
💡 Pro Tip: If using a pre-made gluten free flour blend that already contains xanthan gum, you may not need to add extra binders. However, for a chewier texture, a teaspoon of psyllium husk powder can enhance the dough’s structure.
3. Leavening Agents: Yeast vs. Baking Powder
For bagels, we want a good rise and airy interior while maintaining a dense, chewy bite. This is where yeast and leavening agents come into play.
Which is better: Yeast or Baking Powder?
✔ Yeast – The best choice for authentic bagels. It helps develop flavor and creates air pockets for a better texture. Use active dry yeast or instant yeast for best results.
✔ Baking Powder – Can be used for quick, no-yeast bagels, but the result is more like a dense bread roll than a classic bagel.
💡 Pro Tip: To help activate yeast properly, make sure to:
- Use warm water (110°F/45°C) to activate the yeast.
- Add a little sugar or honey to feed the yeast and promote rising.
- Let the dough rest for at least 1-2 hours for best flavor development.
4. Toppings & Flavor Add-Ins
One of the best parts about making homemade gluten free bagels is the ability to customize them with toppings and mix-ins!
Classic Bagel Toppings
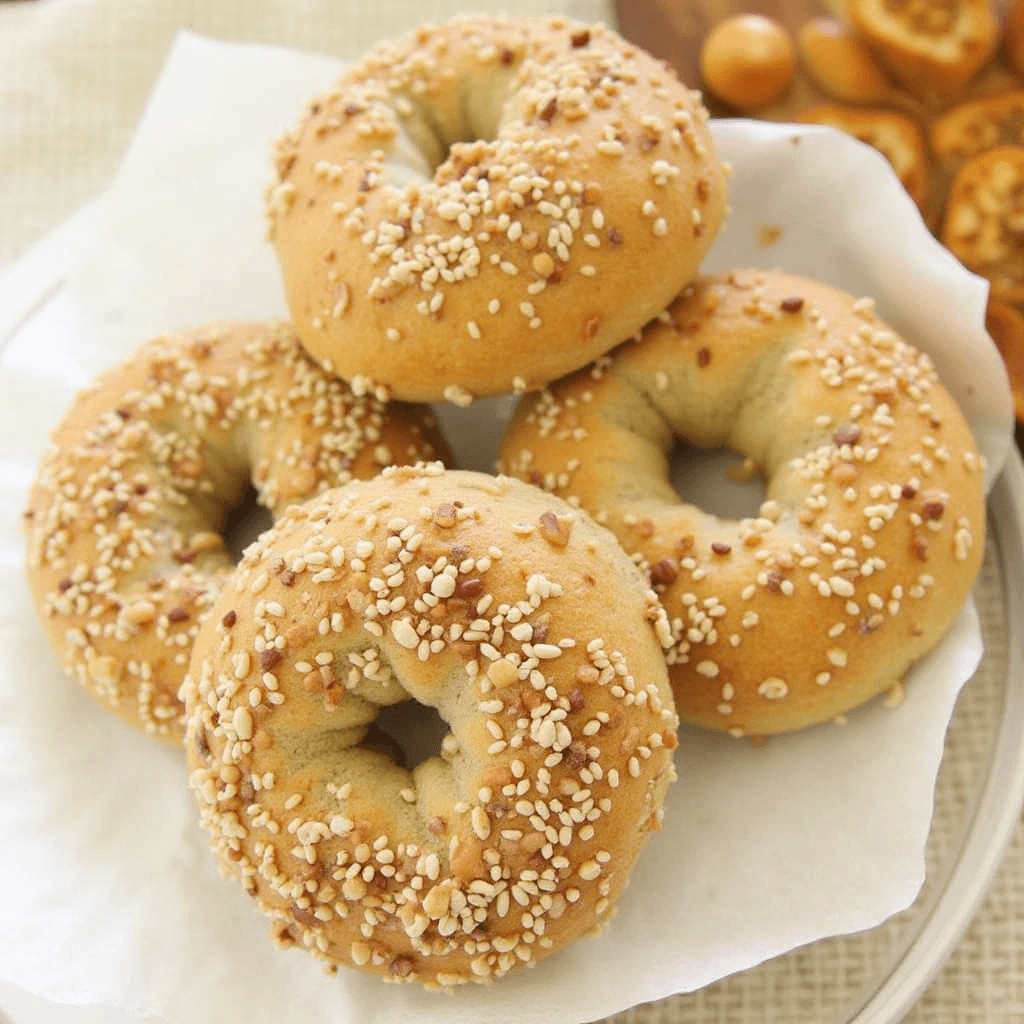
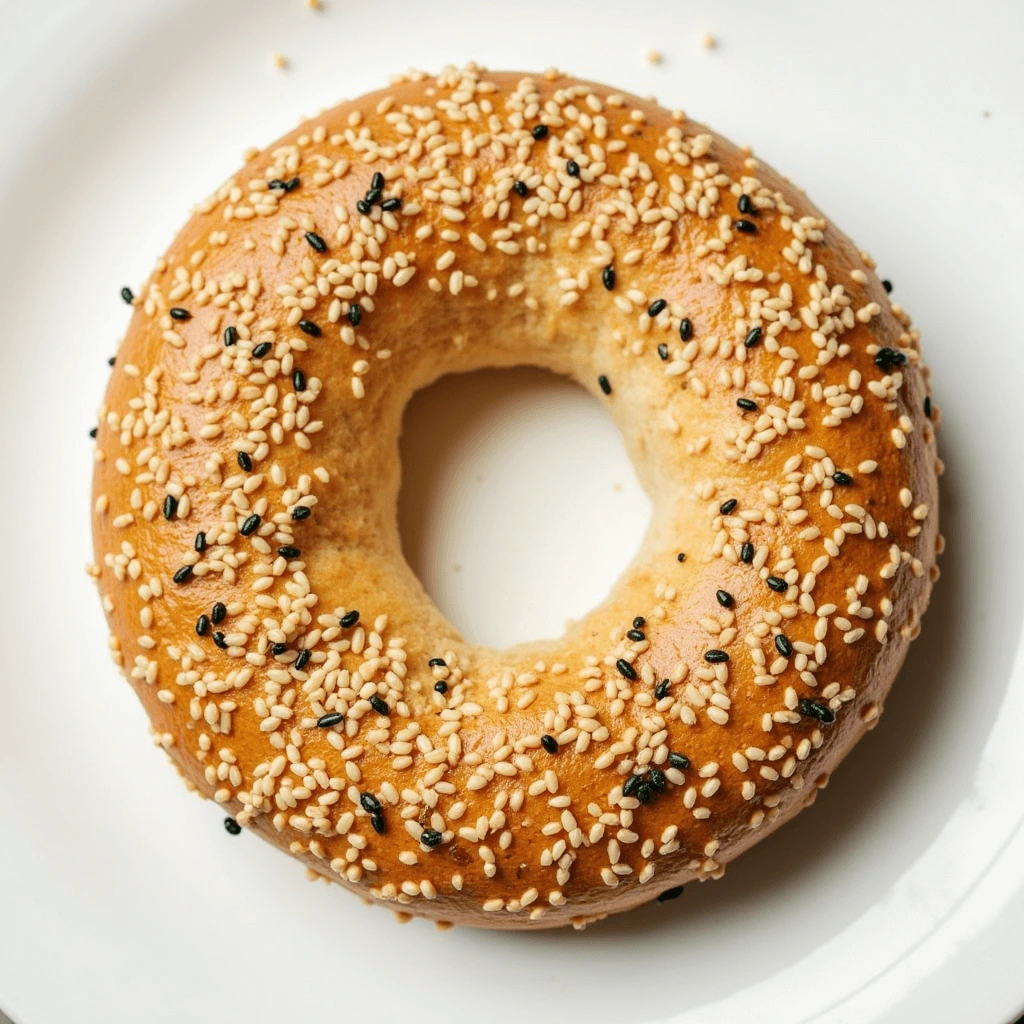
✅ Sesame Seeds – A nutty, crunchy classic.
✅ Poppy Seeds – A traditional choice with a mild crunch.
✅ Everything Bagel Seasoning – A savory blend of sesame, poppy, garlic, onion, and salt.
✅ Cinnamon Sugar – Perfect for sweet bagels with a touch of spice.
Flavor Add-Ins for Unique Variations
✔ Savory Bagels: Garlic & herb, onion, cheese, jalapeño cheddar.
✔ Sweet Bagels: Blueberry, chocolate chip, raisin, maple pecan.
💡 Pro Tip: Brush your bagels with an egg wash (or dairy-free alternative like almond milk) before baking to help toppings stick and create a golden, glossy crust.
Step-by-Step Guide: How to Make Gluten Free Bagels at Home

Making gluten free bagels at home may seem intimidating, but with the right ingredients and techniques, you can achieve chewy, delicious, bakery-quality bagels in your own kitchen. Below, we’ll walk through each step of the process, from preparing the dough to baking the perfect bagels.
Step 1: Gather Your Ingredients
Before you begin, make sure you have everything ready. Here’s what you’ll need:
Dry Ingredients:
✔ 2 ½ cups gluten free flour blend (preferably one with xanthan gum)
✔ 1 tsp xanthan gum (if not included in the flour blend)
✔ 1 tbsp psyllium husk powder (for elasticity)
✔ 1 tbsp sugar or honey (to feed the yeast)
✔ 1 ½ tsp salt
Wet Ingredients:
✔ 1 packet (2 ¼ tsp) active dry yeast
✔ ¾ cup warm water (110°F/45°C)
✔ 1 tbsp olive oil or melted butter
✔ 1 egg (for egg wash, optional)
Boiling Water Bath:
✔ 8 cups water
✔ 1 tbsp honey or maple syrup (for a slightly sweet, chewy crust)
✔ 1 tsp baking soda (for a golden brown finish)
Toppings (Optional):
✔ Sesame seeds, poppy seeds, everything bagel seasoning, cinnamon sugar
Step 2: Activate the Yeast
Yeast is essential for giving your bagels a light, airy interior. Here’s how to activate it:
1️⃣ In a small bowl, combine warm water (110°F/45°C) with sugar or honey. Stir until dissolved.
2️⃣ Sprinkle active dry yeast over the water and let it sit for 5–10 minutes until foamy.
3️⃣ If the yeast doesn’t foam, the water might be too hot or too cold—try again with fresh yeast.
💡 Pro Tip: If using instant yeast, you can mix it directly into the dry ingredients without proofing.
Step 3: Make the Dough
Now it’s time to mix the ingredients and form the dough.
1️⃣ In a large mixing bowl, whisk together the gluten free flour, xanthan gum, psyllium husk powder, and salt.
2️⃣ Make a well in the center and pour in the yeast mixture and olive oil (or melted butter).
3️⃣ Use a spatula or stand mixer to combine until a sticky dough forms.
4️⃣ Knead the dough for about 5 minutes until smooth and pliable. If the dough feels dry, add a little more warm water one teaspoon at a time.
💡 Pro Tip: Gluten free dough tends to be stickier than traditional dough. If needed, lightly grease your hands with olive oil to prevent sticking.
Step 4: Shape the Bagels
Shaping bagels is easier than it looks!
1️⃣ Divide the dough into 6–8 equal portions (depending on your preferred bagel size).
2️⃣ Roll each portion into a smooth ball.
3️⃣ Use your thumb to poke a hole in the center, then gently stretch it into a bagel shape.
4️⃣ Place the shaped bagels on a parchment-lined baking sheet and cover with a clean towel.
5️⃣ Let them rest for 30–45 minutes to allow the dough to rise slightly.
💡 Pro Tip: The hole may shrink slightly as the bagels bake, so make it a little bigger than you think you need!
Step 5: Boil the Bagels (A Crucial Step!)
Boiling is what gives bagels their chewy texture and shiny crust. Don’t skip this step!
1️⃣ In a large pot, bring 8 cups of water to a boil.
2️⃣ Stir in 1 tablespoon of honey (or maple syrup) and 1 teaspoon of baking soda.
3️⃣ Carefully drop 2–3 bagels at a time into the boiling water.
4️⃣ Boil for 30–45 seconds per side, then remove with a slotted spoon and place them back on the baking sheet.
💡 Why Boil Bagels?
- Honey or maple syrup adds slight sweetness and browning.
- Baking soda enhances the golden crust and chewiness.
- Boiling gelatinizes the starches, helping bagels hold their shape.
Step 6: Add Toppings & Bake
Now it’s time to bake the bagels to perfection!
1️⃣ Preheat your oven to 400°F (200°C).
2️⃣ Brush each bagel with an egg wash (whisked egg) for a golden brown finish.
3️⃣ Sprinkle with your favorite toppings (sesame seeds, poppy seeds, etc.).
4️⃣ Bake for 20–25 minutes, or until golden brown and firm.
5️⃣ Let them cool on a wire rack for at least 15 minutes before slicing.
💡 Pro Tip: For extra crispy crust, bake the bagels on a preheated pizza stone or baking steel.
Step 7: Enjoy Your Homemade Gluten Free Bagels!
Your freshly baked gluten free bagels are ready to enjoy! Here are some delicious ways to serve them:
🥯 Classic: Spread with cream cheese and top with smoked salmon.
🍳 Breakfast Sandwich: Fill with scrambled eggs, cheese, and avocado.
🥑 Healthy Option: Top with almond butter and sliced bananas.
🍓 Sweet Treat: Spread with butter and drizzle with honey or jam.
💡 Storage Tips:
- Store bagels in an airtight container at room temperature for 2–3 days.
- For longer storage, freeze in a zip-top bag for up to 3 months. Toast before serving!
Tips for the Best Gluten Free Bagels Every Time

Making gluten free bagels at home can be tricky, but with the right techniques, you can achieve bakery-quality results every time. Below are some essential tips and tricks to ensure your bagels come out chewy, golden, and delicious—just like traditional ones!
1. Choose the Right Gluten Free Flour Blend
The flour blend you use makes a huge difference in the texture and structure of your bagels.
✔ Look for a 1:1 gluten free flour blend with a mix of rice flour, tapioca starch, potato starch, and sorghum flour. These provide the best texture.
✔ Check if the blend contains xanthan gum—if not, add 1 teaspoon per cup of flour to improve elasticity.
✔ Avoid single flours like almond or coconut flour as they lack the structure needed for chewy bagels.
💡 Pro Tip: Brands like Bob’s Red Mill and King Arthur offer great gluten free baking flour blends perfect for bagels.
2. Don’t Skip the Psyllium Husk or Xanthan Gum
✔ Xanthan gum or guar gum mimics gluten’s elasticity, preventing your bagels from becoming crumbly.
✔ Psyllium husk powder improves the dough’s stretchiness, making it easier to shape and resulting in a chewier texture.
✔ Use both for the best structure and chew!
💡 Why Psyllium Husk? It absorbs water, helping to create a more dough-like consistency that holds up well in boiling water.
3. Activate the Yeast Properly
✔ Use warm water (110°F/45°C) to proof your yeast—too hot will kill the yeast, too cold won’t activate it.
✔ Let the yeast sit with sugar for 5–10 minutes until it’s foamy. If it doesn’t bubble, your yeast might be expired!
✔ For extra rise, let the dough rest in a warm spot for at least 30 minutes before shaping.
💡 Pro Tip: Preheat your oven to 200°F (93°C) for a few minutes, then turn it off and place the dough inside with the door slightly open—it creates the perfect warm environment for rising.
4. Knead the Dough Properly (Even Though It’s Gluten Free!)
✔ Gluten free dough is stickier than traditional dough, so lightly grease your hands with olive oil.
✔ Knead for 3–5 minutes to help the ingredients combine fully.
✔ Don’t over-knead, as too much handling can make the dough too stiff.
💡 Troubleshooting: If the dough feels too dry, add 1 teaspoon of warm water at a time until it reaches the right consistency. If it’s too wet, sprinkle in a little extra flour.
5. Boil the Bagels for a Chewy Texture
Boiling is what gives bagels their iconic chewy crust. Here’s how to do it right:
✔ Use a wide, deep pot with enough space for the bagels to float.
✔ Add baking soda (1 teaspoon per quart of water) to enhance browning.
✔ Boil for 30–45 seconds per side—too long makes bagels dense, too short makes them dry.
✔ For a slightly sweet crust, add honey or maple syrup to the boiling water.
💡 Extra Tip: If your bagels deflate after boiling, they may have over-proofed. Reduce the resting time before boiling.
6. Bake at the Right Temperature for Golden Perfection
✔ Preheat the oven to 400°F (200°C) before baking to ensure even cooking.
✔ Use an egg wash (or dairy-free alternative) for a golden brown crust.
✔ Bake on a preheated baking stone or use a lined baking sheet for an evenly crisp bottom.
✔ Rotate the pan halfway through baking to ensure even browning.
💡 Pro Tip: Spritz the oven with water before closing the door to create steam, which helps the bagels develop a better crust.
7. Experiment with Toppings for Extra Flavor
Bagels are best with delicious toppings! Try these ideas:
✔ Classic: Sesame seeds, poppy seeds, everything bagel seasoning
✔ Sweet: Cinnamon sugar, raisins, or a light honey glaze
✔ Savory: Dried onion flakes, garlic powder, shredded cheese
💡 Make it Stick! Brush bagels with egg wash or a dairy-free milk alternative before sprinkling toppings to help them adhere.
8. Store and Reheat for Maximum Freshness
Gluten free bagels dry out faster than regular bagels, so proper storage is key:
✔ Store at room temperature for 2–3 days in an airtight container.
✔ Freeze for up to 3 months in a zip-top bag. Slice them before freezing for easy toasting.
✔ Reheat in the toaster or oven (never microwave!) for the best texture.
💡 Bonus Tip: Wrap bagels in a damp paper towel and warm in the oven for a few minutes to restore softness.
Flavor Variations & Serving Ideas
One of the best things about homemade gluten-free bagels is their versatility! You can customize them with different flavors, toppings, and serving styles to suit any taste preference. Whether you prefer classic, sweet, or savory bagels, this section will guide you through some delicious ideas to elevate your bagel experience.
1. Classic Gluten-Free Bagel Flavors
These timeless options mimic the flavors of traditional bagels but without the gluten:
✔ Plain Bagels: A simple and versatile option that pairs well with any spread.
✔ Everything Bagels: A mix of sesame seeds, poppy seeds, dried garlic, dried onion, and salt for a savory crunch.
✔ Sesame Seed Bagels: Toasted sesame seeds add a nutty, crunchy texture.
✔ Poppy Seed Bagels: A mild, slightly nutty flavor with a classic New York bagel feel.
💡 Serving Tip: Classic bagels pair well with cream cheese, butter, or jam.
2. Sweet Gluten-Free Bagel Variations
If you have a sweet tooth, try these delicious bagel flavors:
✔ Cinnamon Raisin Bagels: Add 1 tsp cinnamon and ¼ cup raisins to the dough for a warm, spiced flavor.
✔ Blueberry Bagels: Fold in ¼ cup dried or fresh blueberries for a fruity burst in every bite.
✔ Chocolate Chip Bagels: Mix in ¼ cup mini chocolate chips for a treat that tastes like dessert.
✔ Pumpkin Spice Bagels: Add ½ tsp pumpkin spice and 2 tbsp pumpkin purée for a cozy, fall-inspired bagel.
💡 Serving Tip: Try topping sweet bagels with honey, almond butter, or a cinnamon-sugar spread.
3. Savory & Gourmet Gluten-Free Bagel Flavors
For those who love bold, savory flavors, these variations are a must-try:
✔ Garlic & Herb Bagels: Add ½ tsp garlic powder and ½ tsp dried oregano to the dough for a zesty, herby taste.
✔ Cheddar Jalapeño Bagels: Fold in ¼ cup shredded cheddar cheese and 1 finely diced jalapeño for a spicy kick.
✔ Sun-Dried Tomato & Basil Bagels: Add ¼ cup chopped sun-dried tomatoes and 1 tsp dried basil for an Italian-inspired flavor.
✔ Onion Bagels: Sprinkle dried minced onions on top before baking for a bold oniony taste.
💡 Serving Tip: Savory bagels pair well with hummus, avocado, or a smoked salmon spread.
4. Gluten-Free Bagel Toppings
Elevate your bagels with these tasty topping ideas:
✔ Seeds & Nuts: Sesame seeds, poppy seeds, sunflower seeds, crushed almonds
✔ Cheese: Shredded cheddar, parmesan, or everything bagel seasoning with cheese
✔ Spices & Herbs: Garlic powder, rosemary, thyme, paprika for an extra kick
✔ Sweet Toppings: Cinnamon-sugar, coconut flakes, drizzle of honey
💡 How to Apply: Brush the bagels with egg wash or melted butter before baking so the toppings stick!
5. Creative Serving Ideas
Bagels aren’t just for breakfast! Try these fun and creative ways to serve them:
✔ Bagel Sandwiches: Use them for deli-style sandwiches with turkey, ham, lettuce, and mustard.
✔ Bagel Pizzas: Slice a bagel in half, top with marinara, cheese, and toppings, then bake for a mini pizza.
✔ Avocado Toast Bagels: Spread mashed avocado and sprinkle with red pepper flakes or feta cheese.
✔ Bagel Burgers: Use toasted bagels instead of buns for a unique burger experience.
✔ French Toast Bagels: Dip sweet bagels in an egg mixture and pan-fry for a decadent breakfast treat.
💡 Make It Fancy: Serve with a side of fruit, salad, or a warm cup of coffee or tea!
Conclusion: Enjoying Homemade Gluten-Free Bagels
Making gluten-free bagels at home is easier than you might think, and the results are well worth the effort. With the right ingredients, techniques, and tips, you can achieve chewy, flavorful bagels that rival traditional bakery-style versions—without the gluten. Whether you prefer classic, sweet, or savory flavors, there are endless ways to customize your bagels to suit your taste.
By following this guide, you’ll be able to bake perfect gluten-free bagels every time, experiment with delicious toppings, and even get creative with unique serving ideas. Plus, making them at home ensures that they are fresh, nutritious, and free from unnecessary additives.
Now it’s time to put your baking skills to the test! Try out different flavors, share your creations, and enjoy the satisfaction of biting into a homemade gluten-free bagel. Have a favorite variation or a question? Let us know in the comments! Happy baking! 😊 🥯
Explore More Recipes: Visit Prerecipes.online to find even more delicious meal ideas to inspire your next cooking adventure!