
Introduction
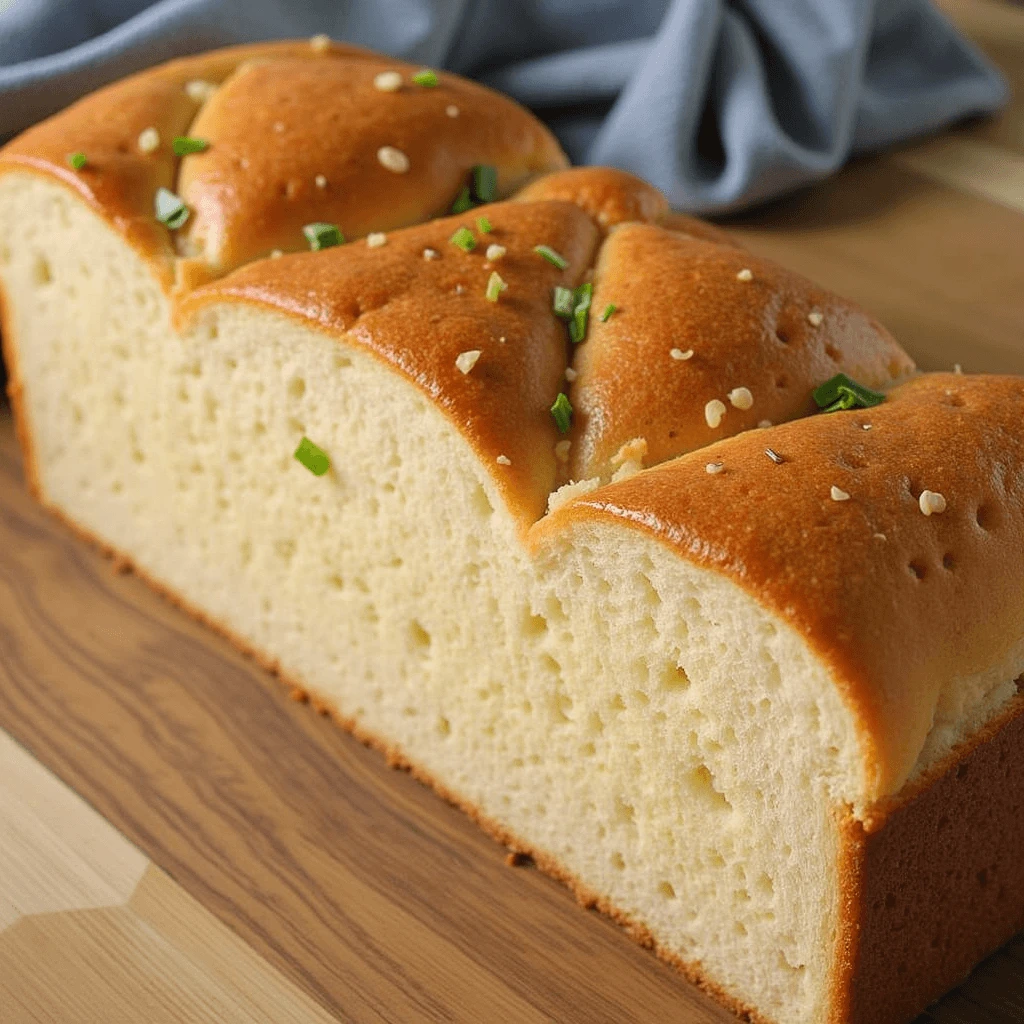
There’s nothing quite like the smell of freshly baked bread filling your kitchen. If you’ve ever wanted to make your own soft, fluffy sandwich bread at home, you’re in the right place! This easy sandwich bread recipe is perfect for beginners and guarantees a tender, airy loaf with a golden crust—ideal for everything from classic PB&J to gourmet sandwiches.
No need for fancy equipment—just a few pantry staples, some patience, and a little kneading will give you a bakery-style sandwich bread that’s better than anything store-bought. Whether you love toast in the morning or need the perfect bread for sandwiches, this step-by-step guide will walk you through everything you need to know.
TL;DR – Why You’ll Love This Recipe:
✔ Beginner-friendly – No complicated techniques!
✔ Soft & fluffy texture – Perfect for sandwiches.
✔ Simple ingredients – Just flour, yeast, water, and a few extras.
✔ Better than store-bought – No preservatives, just fresh homemade goodness.
Why Make Homemade Sandwich Bread?
There’s something special about baking your own sandwich bread at home—from the comforting aroma that fills your kitchen to the satisfaction of slicing into a fresh, soft loaf. While store-bought bread is convenient, making your own comes with several benefits that go beyond just taste. Here’s why you should consider ditching the packaged loaves and embracing homemade goodness.
1. Healthier Than Store-Bought Bread
Most commercial sandwich bread contains preservatives, additives, and artificial ingredients to extend shelf life and enhance texture. Many also include high-fructose corn syrup and excessive sodium, which aren’t ideal for a balanced diet. When you make bread at home, you control every ingredient—no chemicals, no unnecessary sugars, just wholesome, natural goodness.
Homemade bread is also a great option for those with dietary restrictions. Whether you prefer whole wheat, gluten-free, or low-sodium bread, you can customize the recipe to fit your needs.
2. Customizable Flavors and Ingredients
One of the biggest perks of making bread at home is the freedom to experiment. You can switch up the ingredients to create different flavors and textures, such as:
- Whole wheat sandwich bread for a fiber-rich, hearty option
- Honey oat bread for a touch of natural sweetness
- Garlic and herb sandwich bread for a savory twist
- Seeded sandwich bread with chia, flax, or sunflower seeds for extra nutrition
You can also adjust the softness, crust thickness, and density based on your preferences, ensuring that your sandwich bread turns out exactly the way you like it.
3. More Affordable Than Buying Bread Regularly
While a loaf of high-quality bread from a bakery can cost anywhere from $4 to $7 per loaf, making your own requires just a few budget-friendly ingredients. A homemade loaf typically costs less than $2, depending on the ingredients used.
Since homemade bread also stays fresh longer when stored properly, you’ll save money in the long run without compromising on quality or taste.
4. The Joy and Satisfaction of Baking Fresh Bread
There’s a unique sense of accomplishment in creating something from scratch. The process of kneading, proofing, and baking not only connects you with traditional cooking techniques but also offers a therapeutic, stress-relieving activity.
Plus, the smell of fresh bread baking in the oven is something that no store-bought loaf can compete with! Whether you’re making sandwiches, toast, or simply enjoying a warm slice with butter, homemade bread elevates the entire eating experience.
Final Thoughts
Baking homemade sandwich bread isn’t just about saving money or eating healthier—it’s about creating a product that’s fresh, delicious, and tailored to your tastes. Once you start making your own, you’ll wonder why you ever settled for store-bought loaves in the first place!
Ready to get started? Let’s dive into the essential ingredients and tools you’ll need to bake the perfect sandwich bread. 🍞✨
Essential Ingredients and Tools for Homemade Sandwich Bread

Making homemade sandwich bread is easier than you think, and it all starts with using the right ingredients and baking tools. Whether you’re a beginner or an experienced baker, having a solid understanding of what goes into your bread—and why—can make all the difference in achieving the perfect soft, fluffy loaf.
Essential Ingredients for Homemade Sandwich Bread
Each ingredient in sandwich bread plays a crucial role in texture, flavor, and structure. Here’s a breakdown of what you’ll need:
1. Flour: The Foundation of Your Bread
Flour provides the structure and texture of the bread. Choosing the right type is key:
- Bread Flour – Higher in protein, this flour creates a chewier, more structured loaf. Best for a slightly firm yet soft sandwich bread.
- All-Purpose Flour – Works well too, producing a softer, more delicate loaf. Ideal if you want a lighter, airier texture.
- Whole Wheat Flour – Adds nutrients and fiber, but makes the bread denser. Often mixed with bread or all-purpose flour for a balance of nutrition and softness.
Tip: If using whole wheat flour, add a little more liquid to compensate for its higher absorption rate.
2. Yeast: The Key to Rising Bread
Yeast is what makes the dough rise and become airy. You have two main options:
- Active Dry Yeast – Needs to be dissolved in warm water before mixing with the flour.
- Instant Yeast (Rapid-Rise Yeast) – Can be mixed directly with the flour without proofing.
For best results, always check if your yeast is fresh and active. Expired yeast won’t allow the dough to rise properly, leading to a dense loaf.
3. Liquid: Water vs. Milk
The liquid helps hydrate the dough and activates the yeast. Your choice of liquid affects the final bread texture:
- Water – Gives a crisper crust and slightly chewier texture.
- Milk – Adds richness, tenderness, and a softer crumb due to its fat content.
For extra flavor and softness, warm milk (instead of water) can be used in the recipe.
4. Sugar or Honey: Feeding the Yeast and Adding Flavor
A small amount of sugar or honey helps activate the yeast and adds a slight sweetness to balance the flavor.
- Sugar – Helps brown the crust and gives a touch of sweetness.
- Honey – Adds natural sweetness and moisture, making the bread even softer.
Tip: You can reduce or omit sugar, but keep in mind that yeast thrives on it, so rising time might be slightly longer.
5. Salt: Enhancing Flavor and Controlling Fermentation
Salt isn’t just for flavor—it also helps control the yeast’s growth, preventing it from rising too fast and resulting in a well-structured loaf. Without salt, the bread can taste bland and may rise too quickly, leading to an uneven texture.
Important: Always add salt separately from yeast when mixing to avoid killing the yeast.
6. Butter or Oil: Adding Softness
Fats like butter or oil help create a softer, more tender crumb. They also extend shelf life, keeping your homemade bread fresh longer.
- Butter – Adds richness and a slightly buttery taste.
- Olive Oil / Vegetable Oil – Produces a soft texture and enhances moisture.
7. Optional Additions for Enhanced Flavor and Texture
- Eggs: Create a richer, softer bread. Common in brioche-style sandwich bread.
- Vinegar or Lemon Juice: A teaspoon strengthens gluten development for a better rise.
- Seeds and Herbs: Sunflower seeds, chia seeds, rosemary, or garlic can enhance flavor.
Essential Tools for Making Sandwich Bread
While you don’t need fancy equipment, a few basic tools will make the process smoother and ensure perfect results.
1. Mixing Bowls
A large mixing bowl is essential for combining and kneading the dough. A heavy-duty glass or stainless steel bowl works best.
2. Dough Scraper
A dough scraper (bench scraper) helps gather and shape the dough easily, especially when kneading on a counter.
3. Loaf Pan
To get the classic sandwich bread shape, you’ll need a 9×5-inch loaf pan (or an 8.5×4.5-inch pan for a taller loaf). Nonstick pans or well-greased metal pans work best.
4. Measuring Cups and Kitchen Scale
For precise measurements, especially for flour and liquid ingredients, a kitchen scale is more accurate than measuring cups. Consistency in weight ensures perfect bread texture every time.
5. Rolling Pin (Optional for Shaping the Dough)
A rolling pin helps create a smooth, even loaf before placing it in the pan for the final proofing.
6. Oven Thermometer
Most home ovens run hotter or cooler than the set temperature. Using an oven thermometer ensures your bread bakes at the right temperature (350°F-375°F for sandwich bread).
7. Cooling Rack
After baking, the bread should cool on a wire rack to prevent condensation from making the bottom soggy. Letting it cool completely before slicing helps maintain the perfect texture.
Step-by-Step Guide to Making Soft and Fluffy Sandwich Bread

Making homemade sandwich bread might seem intimidating at first, but with the right steps, you’ll achieve a soft, fluffy loaf that’s perfect for sandwiches, toast, or simply enjoying with butter. Follow this step-by-step guide, and you’ll have a golden, delicious loaf in no time!
Step 1: Gather Your Ingredients
Before you start, make sure you have all the necessary ingredients measured and ready. Here’s what you’ll need for a basic sandwich bread recipe:
Ingredients:
- 3 ½ cups (420g) bread flour or all-purpose flour (plus extra for dusting)
- 1 packet (2 ¼ teaspoons) instant yeast or active dry yeast
- 1 cup (240ml) warm milk or water (110°F/43°C – warm to the touch)
- 2 tablespoons (30g) unsalted butter or vegetable oil (softened)
- 2 tablespoons (25g) sugar or honey
- 1 teaspoon (5g) salt
Tools You’ll Need:
✔ Large mixing bowl
✔ Measuring cups & spoons or a kitchen scale
✔ Stand mixer (optional)
✔ Loaf pan (9×5 inch)
✔ Dough scraper or spatula
✔ Clean kitchen towel or plastic wrap
✔ Wire cooling rack
Now that you have everything ready, let’s start baking!
Step 2: Activate the Yeast
If using active dry yeast, you’ll need to proof it before mixing:
- In a small bowl, combine warm milk (or water) and sugar (or honey).
- Sprinkle the yeast on top, stir lightly, and let it sit for 5–10 minutes until it becomes foamy and bubbly. This means your yeast is active.
👉 If using instant yeast, you can skip this step and mix it directly with the flour.
Step 3: Mix the Dough
- In a large mixing bowl, combine flour and salt.
- Add the activated yeast mixture and butter or oil.
- Mix everything together with a wooden spoon or use a stand mixer with a dough hook on low speed.
Once the dough comes together, it’s time to knead!
Step 4: Knead the Dough
Kneading develops gluten, which gives your bread structure and elasticity.
By Hand:
- Transfer the dough to a lightly floured surface.
- Use the heel of your hand to push the dough away, then fold it back over itself.
- Rotate and repeat for 8–10 minutes until the dough is smooth and elastic.
Using a Stand Mixer:
- Knead with the dough hook attachment on medium speed for 5–6 minutes.
- Stop when the dough is soft, stretchy, and slightly tacky.
👉 To check if the dough is ready, perform the “windowpane test” by stretching a small piece of dough between your fingers. If it stretches thin without tearing, it’s kneaded enough!
Step 5: First Rise (Proofing the Dough)
- Form the dough into a smooth ball and place it in a lightly greased bowl.
- Cover with a clean towel or plastic wrap.
- Let it rise in a warm place (75–80°F) for 1–2 hours, or until doubled in size.
🔹 Tip: If your kitchen is cold, place the bowl in a slightly warm oven (turned off) or near a warm window.
Step 6: Shape the Dough into a Loaf
- Punch down the risen dough to release air bubbles.
- Transfer it to a lightly floured surface.
- Flatten it into a rectangle (about the length of your loaf pan).
- Roll it tightly into a log, pinching the seam to seal.
- Place it into a greased loaf pan, seam-side down.
Step 7: Second Rise (Final Proofing)
- Cover the loaf pan with a towel and let it rise again for 30–45 minutes, or until it puffs up and reaches about 1 inch above the pan.
- Preheat your oven to 375°F (190°C).
Step 8: Bake the Bread
- Place the loaf in the preheated oven and bake for 25–30 minutes, or until the top is golden brown.
- To check for doneness, tap the bottom of the loaf—it should sound hollow.
- If the crust browns too quickly, cover it loosely with foil for the last 10 minutes of baking.
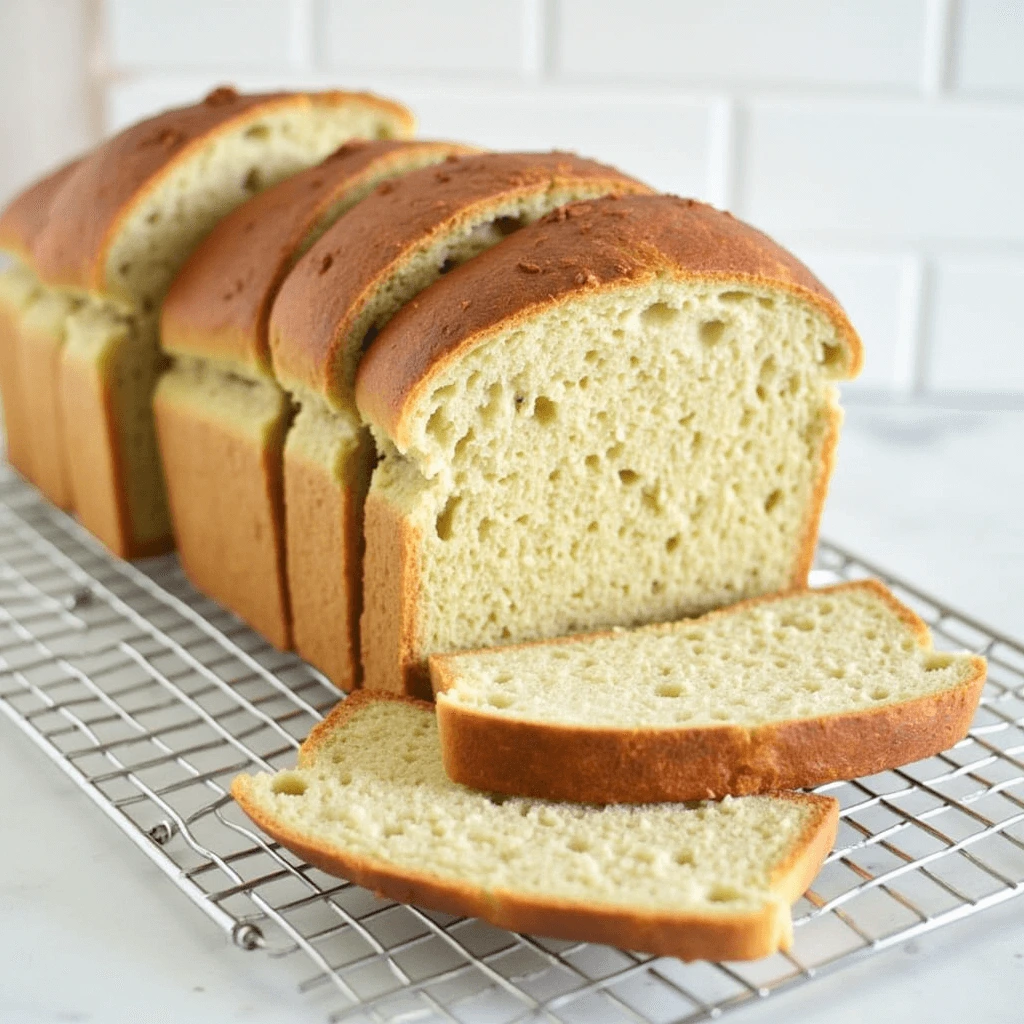
Step 9: Cool and Slice
- Remove the bread from the oven and let it rest in the pan for 5 minutes.
- Transfer it to a wire rack and let it cool completely before slicing.
👉 Slicing too soon can cause the bread to become gummy inside.
Step 10: Store Your Homemade Bread
Once completely cool, store your bread properly to keep it fresh longer:
- At Room Temperature: Store in a bread box or airtight bag for 3–4 days.
- In the Refrigerator: Keeps for up to 1 week (but may dry out faster).
- In the Freezer: Wrap slices in plastic wrap and freeze for up to 3 months.
Common Sandwich Bread Baking Mistakes and How to Fix Them

Baking homemade sandwich bread can be incredibly rewarding, but it’s not always smooth sailing—especially for beginners. From dense loaves to undercooked centers, a lot can go wrong. But don’t worry! Here, we’ll go over the most common sandwich bread baking mistakes and how to fix them, so you can consistently achieve soft, fluffy, and perfectly baked bread.
1. Bread Is Too Dense or Heavy
What Went Wrong?
- Not enough kneading: Proper kneading develops gluten, which gives bread its soft and airy texture.
- Too much flour: Adding too much flour during kneading makes the dough too dry and stiff, preventing proper rising.
- Inactive yeast: If your yeast is expired or wasn’t activated properly, it won’t produce enough gas to make the dough rise.
How to Fix It:
✅ Knead longer: Aim for 8–10 minutes by hand or 5–6 minutes in a stand mixer. Do the windowpane test—if the dough stretches thin without tearing, it’s kneaded enough.
✅ Measure flour correctly: Use a kitchen scale for accuracy. If using cups, spoon the flour into the cup and level it off rather than scooping directly.
✅ Check your yeast: If using active dry yeast, always proof it in warm water (110°F) with sugar before adding it to the dough. If it doesn’t foam after 10 minutes, it’s dead—use fresh yeast.
2. Bread Didn’t Rise Properly
What Went Wrong?
- Dough didn’t proof long enough: If you cut the rising time short, the dough won’t develop enough gas to rise fully.
- Room temperature was too cold: Yeast needs a warm, draft-free environment to grow.
- Yeast was old or not activated properly: Expired or improperly stored yeast won’t work.
How to Fix It:
✅ Let the dough rise longer: Be patient! The first rise should take about 1–2 hours, or until doubled in size. The second rise should take 30–45 minutes.
✅ Create a warm environment: Place the bowl near a warm window, in an oven with the light on, or on top of a slightly warm stovetop. Avoid direct heat!
✅ Use fresh yeast: Always check the expiration date and store yeast in a cool, dry place or in the fridge for longer shelf life.
3. Crust Is Too Hard or Thick
What Went Wrong?
- Baked too long or at too high a temperature.
- Too little fat (butter or oil) in the dough.
- Not enough moisture in the oven.
How to Fix It:
✅ Check your oven temperature: Use an oven thermometer to ensure your oven is at 375°F (190°C). Some ovens run hotter than their settings!
✅ Brush with butter: Right after baking, brush the hot loaf with melted butter to soften the crust.
✅ Add moisture: Place a small pan of hot water in the oven while baking to create steam, which helps keep the crust from getting too thick.
4. Bread Collapses After Baking
What Went Wrong?
- Overproofed dough: If the dough rises too much before baking, it will collapse.
- Too much liquid in the dough: This weakens the structure, causing it to sink.
- Bread wasn’t fully baked: If the inside is still too wet, the structure won’t hold.
How to Fix It:
✅ Don’t overproof: The dough should double in size, not triple. Press it lightly—if it slowly springs back, it’s ready to bake.
✅ Check hydration: Follow the recipe closely and don’t add too much water or milk. If the dough is too sticky, add small amounts of flour until manageable.
✅ Bake thoroughly: Bread should sound hollow when tapped on the bottom. Use a thermometer—fully baked bread should be 190–200°F (88–93°C) inside.
5. Bread Is Undercooked in the Middle
What Went Wrong?
- Oven temperature was too high: This causes the crust to brown too fast while the inside remains raw.
- Baking time was too short.
- Dough was too wet or under-kneaded.
How to Fix It:
✅ Lower the oven temperature: If your bread browns too quickly, reduce the temperature by 25°F (about 10°C) and bake longer.
✅ Use an internal thermometer: Bread should reach 190–200°F (88–93°C) in the center before removing it from the oven.
✅ Cover with foil: If the crust browns too fast but the inside isn’t done, tent the loaf with foil for the last 10–15 minutes of baking.
6. Bread Has a Yeasty or Alcoholic Smell
What Went Wrong?
- Overproofed dough: Letting the dough rise for too long can create an overly strong yeast flavor.
- Too much yeast in the recipe.
- Fermented too warm: If the dough rises in a hot spot, yeast will work too fast and create strong flavors.
How to Fix It:
✅ Stick to proper proofing times: If the dough has doubled in size, don’t let it sit too much longer.
✅ Use the right amount of yeast: Follow the recipe and avoid adding extra.
✅ Proof in a cooler spot: Keep the dough at 75–80°F (24–27°C). Avoid direct sunlight or hot stovetops.
7. Bread Is Too Dry or Crumbly
What Went Wrong?
- Too much flour or not enough liquid.
- Not enough fat (butter or oil).
- Overbaked, causing moisture loss.
How to Fix It:
✅ Adjust flour-to-liquid ratio: If the dough feels too dry while mixing, add 1 tablespoon of water or milk at a time until it softens.
✅ Use enough fat: Butter or oil helps keep bread moist—don’t skip it!
✅ Bake just right: Use a thermometer to check doneness instead of relying on time alone.
Conclusion
Making your own homemade sandwich bread is a rewarding experience that brings freshness, flavor, and complete control over the ingredients. Whether you’re baking for a healthier alternative, cost savings, or simply the joy of homemade bread, this step-by-step guide ensures you get soft, fluffy, and delicious results every time.
By using the right ingredients, following proper techniques, and avoiding common mistakes, you’ll master the art of bread-making in no time. Plus, nothing beats the smell of fresh bread filling your kitchen!
So, why settle for store-bought when you can bake a perfect sandwich loaf at home? Give this recipe a try, experiment with variations, and enjoy the satisfaction of baking your own bread. Happy baking! 🍞
Explore More Recipes: Visit Prerecipes.online to find even more delicious meal ideas to inspire your next cooking adventure!